Effective Brushing Techniques for Pet Teeth
by admin in Pet Care Basics 110 - Last Update December 1, 2025
I\'ll be honest, the first time I tried to brush my dog\'s teeth, it was a complete disaster. I had this giant toothbrush, some chicken-flavored paste, and a very uncooperative Golden Retriever. He thrashed, I got paste on my shirt, and we both ended up stressed. I almost gave up, thinking dental chews were enough. But after a chat with my vet about the risks of periodontal disease, I knew I had to master this. It took time, but I eventually found a rhythm and a set of techniques that work for both my dog and my much more finicky cat.
Choosing the right tools: My personal trial and error
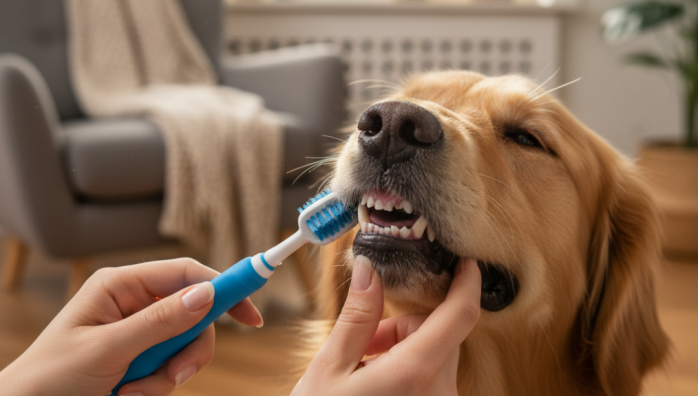
My first mistake was using a brush that was way too big and intimidating. I\'ve since learned that the tool has to fit the pet. For my cat, and even for starting out with my dog, a simple finger brush was the game-changer. It feels less like a foreign object and more like my own finger, which they\'re already used to. For my dog\'s back molars, I eventually graduated to a dual-headed brush with a smaller end that can get into tight spots. The most important thing here is to only use toothpaste formulated for pets. Human toothpaste contains ingredients like xylitol and fluoride which are toxic to them, so this is a non-negotiable safety rule in my house.
The slow and steady approach that finally worked
I learned the hard way that you can\'t just go for it on day one. It\'s a process of desensitization, and it requires a ton of patience. Here\'s the gentle, step-by-step method that turned things around for us.
Step 1: Introduce the toothpaste
Before even thinking about a brush, I let them lick a tiny dab of the enzymatic pet toothpaste off my finger. I did this for a few days, making it a positive treat. They started to associate the flavor with a good experience.
Step 2: Get comfortable with touch
Once they liked the paste, I started gently handling their muzzle. I\'d put a bit of paste on my finger and just rub it along their outer gum line. No brush involved. The goal was simply to get them used to me touching their mouth without any resistance.
Step 3: Combine the brush and paste
Finally, I introduced the finger brush with a small amount of paste. I started with just the front canines, using a gentle, circular motion for a few seconds, and then stopped and gave lots of praise. Over weeks, I gradually worked my way to the back molars, focusing on the outer surfaces where tartar builds up the most. The key was keeping sessions short and positive.
Brushing techniques for dogs vs. cats
While the gradual approach works for both, I\'ve had to adapt my technique. My dog is fairly tolerant, so I can gently lift his lip to access the back teeth. For my cat, it\'s a different story. I find the best approach is to come from behind, cradling her gently, and use a finger brush to quickly swipe the outside of her canines and premolars. I don\'t even try to do the inside; it\'s too stressful for her, and the vet confirmed focusing on the outer surfaces is the most critical part.
Finding a realistic routine
In a perfect world, I\'d brush their teeth daily. Realistically, I aim for 3-4 times a week. Consistency is more important than perfection. Linking the brushing to another routine, like our evening cuddle on the couch, has helped make it a habit. Remember, this is just one part of a complete dental care plan. It\'s what has worked for my pets, but I always rely on our annual vet check-ups for professional cleaning and advice. I strongly recommend you discuss your pet\'s specific needs with your veterinarian to create the best plan.