Basic Ear Cleaning for Cats and Dogs
by admin in Pet Care Basics 151 - Last Update November 30, 2025
I\'ll never forget the first time I noticed my golden retriever, Max, constantly shaking his head and scratching at his ears. I felt so helpless. I was worried I\'d hurt him if I tried to look, but I also knew I couldn\'t ignore it. That experience taught me one of the most valuable lessons in pet care: regular, gentle ear checks are not just about grooming, they\'re a fundamental part of keeping our furry family members comfortable and healthy.
Why regular ear checks are so important
Honestly, I used to think ear cleaning was something only the groomer or the vet needed to handle. I was wrong. For dogs with floppy ears like labs and cocker spaniels, or even cats who are prone to wax buildup, a little bit of at-home maintenance can prevent big problems. I learned that moisture and debris can get trapped, creating the perfect environment for yeast or bacterial infections. A quick weekly peek into their ears has since become a non-negotiable part of our routine, and it\'s saved us from more than one potential vet bill and a lot of discomfort for my pets.
Gathering your supplies: what i use
Over the years, I\'ve simplified my toolkit down to the absolute essentials. You don\'t need a lot of fancy gadgets. Here\'s what I always have on hand:
- A veterinarian-approved ear cleaner: This is critical. I never use water, alcohol, or hydrogen peroxide, as they can cause irritation. I asked my vet for a recommendation, and I\'ve stuck with a gentle, pH-balanced solution ever since.
- Cotton balls or soft gauze pads: These are perfect for gently wiping away debris from the parts of the ear you can see. I learned early on to stay away from cotton swabs (like Q-tips), as they can easily push debris further down or even damage the eardrum.
- High-value treats: This is my secret weapon! Ear cleaning should be a positive experience. I use small pieces of freeze-dried chicken to make it something my dog and cat look forward to.
My step-by-step guide for dogs
The key for me was creating a calm, predictable routine. Rushing or being stressed will only make your dog anxious. Here\'s the process that works for us:
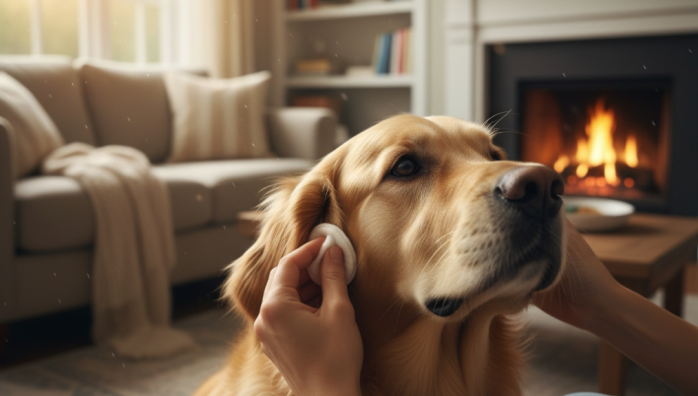
- I have my dog sit in a comfortable, well-lit area, usually between my legs on the floor for gentle control. I start with lots of praise and a treat just for being calm.
- I gently lift the ear flap to look inside. I\'m checking for redness, excessive debris, or any unusual odors. A little bit of light brown wax can be normal, but a strong, yeasty smell is a red flag for me.
- I apply a few drops of the vet-approved cleaning solution directly into the ear canal. I don\'t put the bottle tip too far inside.
- Next, I gently massage the base of the ear for about 20-30 seconds. You\'ll hear a squishing sound, which means the cleaner is working to break up the wax and debris.
- I let my dog shake his head! I used to try to stop this, but it\'s a crucial step that helps bring the gunk up from deeper in the canal. I just stand back and let it happen.
- Finally, I take a clean cotton ball and gently wipe out the ear flap and the parts of the canal I can easily see. I never, ever push down into the canal. I just clean the \'outer\' bits.
- Lots more praise and another high-value treat, and we\'re done! We only do one ear at a time if he\'s feeling fidgety.
A gentler approach for cats
My cat, Luna, is a different story. She\'s far less patient. With her, speed, confidence, and gentleness are key. The process is similar, but I keep the session extremely short. I\'ll often just apply the cleaner, give her a quick ear massage, and let her shake. I only wipe with a cotton ball if I see obvious dirt. Forcing it with a cat has never worked for me; it\'s all about making it a quick, positive, and treat-filled event.
When to stop and call the vet
This is the most important part. My at-home cleaning is for maintenance, not for treating problems. If I ever see signs of a real issue, I stop immediately and call my veterinarian. These signs include a strong, foul odor, dark discharge that looks like coffee grounds (a classic sign of ear mites), excessive head shaking or scratching, redness and swelling, or if the ear is painful to the touch. Trying to clean an infected ear can cause immense pain and make the problem worse. This routine is what I\'ve found works for my pets, but I always recommend chatting with your vet to find the best approach for yours.