Home Bathing Techniques for Dogs
by admin in Pet Care Basics 150 - Last Update November 23, 2025

Honestly, I used to dread bath time. It was a chaotic mix of a soaking wet bathroom, a stressed-out dog, and me feeling like I\'d just run a marathon. For years, I thought this was just the reality of bathing a dog at home. But after years of practice with my own dogs, from stubborn terriers to anxious rescues, I\'ve learned that it doesn\'t have to be a battle. It can actually be a calm, bonding experience if you approach it with the right preparation and mindset.
Preparing for a stress-free bath
The secret to a calm bath is having everything ready before your dog even hears the water running. Scrambling for a towel while holding a slippery, wet pup is a recipe for disaster—I\'ve been there! Before I start, I lay out two or three old towels, the dog shampoo (with the cap open), a non-slip mat for the tub, and a special treat for afterwards. Creating a calm environment for myself helps my dog feel more relaxed, too.
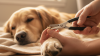
The pre-bath brush out is non-negotiable
I learned this lesson the hard way with my long-haired dog. I once skipped the brushing and the water turned small tangles into tight, painful mats that were a nightmare to remove. Water acts like a cement on knots. Now, I always give my dog a thorough brush-out to remove loose fur and detangle any knots *before* they get wet. It makes the washing process more effective and much more comfortable for them.
My step-by-step bathing process
Once everything is prepared, I follow a simple routine that has worked for every dog I\'ve owned. It\'s all about being methodical and gentle.
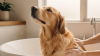
- Test the water. Always use lukewarm water. I test it on my wrist, just like you would for a baby\'s bath. Water that\'s too hot can burn their skin, and water that\'s too cold is just plain unpleasant for them.
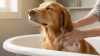
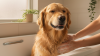
- Get them comfortably wet. I use a detachable shower head on a low-pressure setting. I start at their neck and work my way back, avoiding their face and ears completely for now. Keeping their head dry until the very end helps reduce their anxiety.
- Lather up. I apply a line of dog-specific shampoo along their spine and work it into a gentle lather. I make sure to get their belly, legs, and tail, using my fingers to massage it down to the skin.
- Rinse, and rinse again. This is critical. Leftover shampoo residue is a very common cause of skin irritation and itching. I rinse until the water runs completely clear and I can\'t feel any more slippery soap on their coat.
- Wash the face carefully. I never pour water over my dog\'s head. Instead, I use a damp washcloth to gently wipe their face, taking care to avoid getting any water or soap in their eyes or ears.
Drying techniques that actually work
The bath isn\'t over when the water is turned off. Getting your dog dry properly prevents that \'wet dog\' smell and keeps them from getting chilled. I start with a good towel dry while they\'re still in the tub to contain the initial spray. For my short-haired dogs, a vigorous towel rub is often enough. For my fluffier dog, I invested in a high-velocity pet dryer. It took some time to get him used to it with lots of treats and patience, but it cuts drying time in half and leaves his coat looking fantastic. If you use a human hairdryer, always keep it on the lowest heat setting and hold it far from their skin. Of course, this is all just my personal experience, and if your dog has any skin conditions, it’s always best to chat with your vet about the best bathing and drying methods.