Dog Toothbrushing Techniques at Home
by admin in Pet Care Basics 159 - Last Update November 20, 2025
I\'ll be honest, the first time I tried to brush my dog\'s teeth, it was a complete disaster. I had a wiggling, unhappy pup and toothpaste pretty much everywhere except on his teeth. For a long time, I just gave up, thinking dental chews were enough. But after a costly vet visit for a professional cleaning, I realized that at-home brushing wasn\'t just a suggestion; it was a non-negotiable part of his healthcare. It took some trial and error, but I finally figured out a system that works for us, and I want to share the techniques that turned our wrestling matches into a calm, routine bonding moment.
Getting started: what you\'ll need
Before you even think about approaching your dog, gathering the right tools is the most important first step. I learned the hard way that you can\'t just grab your own toothpaste. Human toothpaste contains ingredients like xylitol, which is extremely toxic to dogs. You\'ll need:
- A dog-specific toothpaste: These come in dog-friendly flavors like poultry or beef. I found that my dog was much more receptive when the paste tasted like a treat. Enzymatic versions are great as they help break down plaque with their active ingredients.
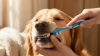
- A toothbrush for dogs: There are a few options here. I started with a soft-bristled finger brush, which is just a little rubber sheath that goes over your index finger. It felt less intimidating for my dog. As he got more comfortable, we graduated to a dual-headed, long-handled brush that makes it easier to reach the back molars.
The slow and steady introduction process
The biggest mistake I made initially was trying to do too much, too soon. The secret is patience and creating a positive association. This isn\'t a race; it\'s about building trust. I broke the process down into tiny, manageable steps over several days.
Step 1: Making toothpaste a treat
For the first few days, I didn\'t even use a toothbrush. I\'d put a small dab of the dog toothpaste on my finger and just let him lick it off. I did this at a calm time of day, praised him enthusiastically, and then we\'d go play. The goal was simple: to make him think, \"Oh, this stuff is a delicious treat!\"
Step 2: Introducing the tool
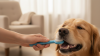
Once he was excited about the toothpaste, I introduced the finger brush. I\'d put the paste on the brush and let him lick it off. We did this for another couple of days. He was allowed to sniff it, nudge it, and get comfortable with this new object in his own time. No brushing yet, just associating the tool with the tasty paste.
Step 3: The first touch
This was the real breakthrough. With some paste on the finger brush, I gently lifted his lip and just touched the brush to one of his canine teeth for a single second. Then I immediately pulled back and gave him tons of praise. We kept these sessions under a minute. Slowly, over the next week, I increased the time from one second to a few seconds, moving the brush around to different teeth.
The correct brushing technique
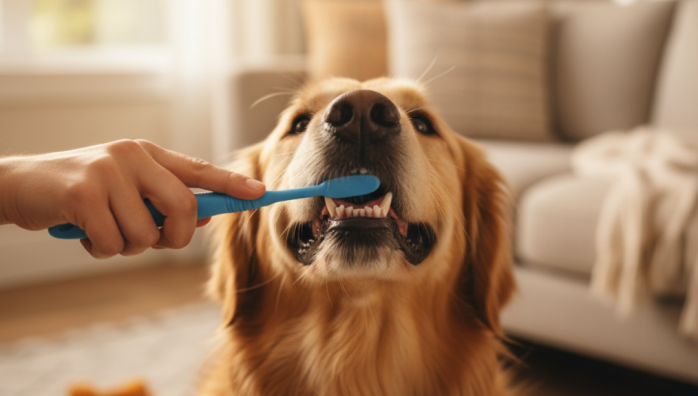
Once your dog is comfortable with the brush being in their mouth, you can begin the actual brushing. I find it easiest to sit on the floor with my dog, either with him between my legs or sitting beside me. I gently lift his upper lip on one side and start brushing the outer surfaces of his teeth in a small, circular motion. I focus on the gumline, as this is where plaque and tartar love to accumulate. You don\'t need to worry too much about the inside surfaces; their tongue does a pretty good job of keeping those clean. I aim for about 30 seconds on each side.
My final thoughts and a word of caution
Today, brushing is just part of our daily wind-down routine. It took patience, but the peace of mind is worth it. Remember that every dog is different; some might take to it in a week, others might take a month. The key is to stay positive and never force it. This is just what worked for my dog, but I always recommend chatting with your vet first. They can assess your dog\'s current dental health and give you personalized advice for keeping those pearly whites healthy for years to come.