Brushing Your Dog's Teeth Step by Step
by admin in Pet Care Basics 148 - Last Update November 19, 2025
I\'ll be honest, for the first few years I had my rescue mutt, Charlie, brushing his teeth felt like a chore I could skip. I gave him dental chews and thought that was enough. It wasn\'t until a routine vet visit that the vet pointed out the significant tartar building up on his back molars. It was a real wake-up call for me. I realized I was neglecting a fundamental part of his health, and I was determined to get it right. It took patience, a few different toothbrushes, and a lot of chicken-flavored toothpaste, but we finally found a routine that works for both of us.
Getting the right tools: what I learned the hard way
My first mistake was thinking any brush would do. I quickly learned that the right gear makes all the difference. Don\'t make the same errors I did; start with the right supplies from day one. And please, never, ever use human toothpaste. It often contains xylitol, which is extremely toxic to dogs.
- Dog-Specific Toothpaste: This is non-negotiable. I found enzymatic toothpastes work best for us. They come in flavors dogs actually enjoy, like poultry or beef. Letting Charlie lick a bit off my finger was our first step to making this a positive experience.
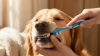
- The Right Brush: I tried a few types. The long-handled, angled brushes are great for reaching the back teeth. However, when we were just starting, a soft rubber finger brush was less intimidating for Charlie. It allowed me to gently massage his gums and get him used to the sensation without a foreign object in his mouth.
The step-by-step process that worked for us
This isn\'t a race. The goal is to build trust and make this a calm, regular part of your routine. Rushing it will only create fear and resistance. This is the slow and steady method I developed with Charlie.
<Step 1: Introduction and taste testing
For a few days, I did nothing more than put a dab of the dog toothpaste on my finger and let him lick it off. I wanted him to associate the flavor with a positive treat. I didn\'t even think about his teeth yet. This was all about building a good first impression.
Step 2: Getting comfortable with touch
Once he was excited for the toothpaste, I started gently rubbing my finger along his gums and the outside of his teeth. Still no brush. Just my finger with a bit of that tasty paste. I\'d do this for just 15-20 seconds, followed by lots of praise and maybe a small treat.
Step 3: Introducing the brush
I brought out the finger brush. I let him sniff it, then put a dab of toothpaste on it and let him lick it. The next step was to gently rub just one or two of his front teeth with the brush. We did this for several days until he was completely relaxed with the process.
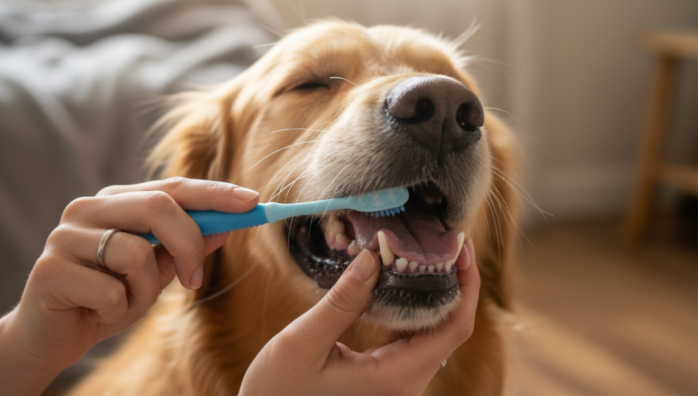
Step 4: Building up to a full routine
Finally, we were ready for a full, albeit short, brushing session. I gently lifted his lip and, using small, circular motions, brushed the outside surfaces of his teeth. I focused on the outside, as that\'s where most tartar accumulates. We started with 30-second sessions and gradually worked our way up to about two minutes. To this day, I don\'t worry too much about the inside surfaces, as his tongue does a decent job there, and it\'s not worth the struggle.
Tips from my experience: making it a positive habit
Consistency is more important than perfection. A quick, positive session every day is far better than a perfect-but-stressful session once a week. I always choose a time when Charlie is calm and relaxed, usually in the evening after our last walk. And I always end with a huge amount of praise. He now sees it as just another part of our daily wind-down. Remember, this is the routine that I found success with. If you notice any redness, bleeding, or your dog seems in pain, it\'s always best to have a chat with your vet before you start.