Safe Home Nail Trimming for Dogs
by admin in Pet Care Basics 147 - Last Update November 23, 2025
I still remember the sound my dog\'s nails used to make on our hardwood floors. That rhythmic click-clack wasn\'t just noise; it was a constant reminder of a task I dreaded: trimming his nails. For years, the thought of it filled me with anxiety. What if I hurt him? What if I cut the quick? It felt safer to just pay a groomer or the vet, but the stress it put on my dog (and my wallet) eventually pushed me to learn how to do it myself, calmly and safely.
Why I learned to trim my dog\'s nails at home
Honestly, it was a combination of things. The appointments were inconvenient, and my dog would get so worked up in the car, knowing where he was going. I could see the stress in his eyes. I realized that if I could make nail trimming a low-key, routine event in the comfort of our home, it would be better for both of us. It was about transforming a scary ordeal into a simple moment of care, and believe me, the trust it builds is incredible.
Choosing the right tool for the job
The world of nail trimmers is surprisingly vast, but it mostly boils down to two types: clippers and grinders. I\'ve used both extensively, and each has its place.
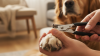
The classic clippers (scissor or guillotine)
I started with a pair of scissor-style clippers because they felt more intuitive. They work just like scissors and give you a quick, clean cut. Guillotine-style clippers, where the nail goes through a hole, are also popular, but I found them a bit harder to position correctly. For me, the key with clippers is ensuring the blade is razor-sharp. A dull blade can crush the nail instead of cutting it, which is painful for your pup.
The gentle power of a nail grinder
A few years ago, I invested in a pet nail grinder, and it was a game-changer, especially for my dog\'s dark nails where spotting the quick is tough. A grinder lets you file the nail down slowly, bit by bit. This gives you incredible control and smooths the nail edge, so there are no sharp bits. The only downside is the noise and vibration, which takes some dogs a little getting used to. We started by just turning it on and giving treats, long before we ever touched it to his nails.
My step-by-step method for a stress-free trim
This is the routine I\'ve refined over the years. It\'s built on patience and positive reinforcement.
- Create a calm space: We do it in the living room on a comfy rug, not on a cold, slippery table. I get my tools, some high-value treats, and styptic powder (just in case) ready beforehand.
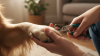
- Handle the paws first: I don\'t just grab his paw and start clipping. I spend a minute just gently holding and massaging his paws, rewarding him with a treat for his calm cooperation. This desensitization is crucial.
- Identify the quick: On my dog\'s lighter nails, I can see the pinkish quick inside. On his dark nails, I can\'t. So, my rule is to trim only tiny slivers at a time. As you get closer to the quick, you\'ll see a small, dark circle appear in the center of the cut nail surface. That\'s your signal to stop.
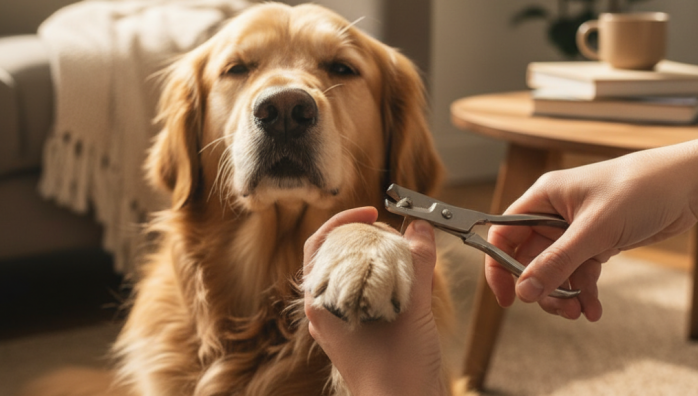
- The trim itself: I hold the paw firmly but gently and clip just the very tip of the nail. One small clip per nail, followed by a treat and praise. We might only do one paw in a session, and that\'s okay! The goal is progress, not perfection.
- If an accident happens: It has happened to me, and panic is the worst response. I stay calm, say \"oops!\", and press a pinch of styptic powder onto the nail tip for about 30 seconds. I give him a jackpot of treats and we end the session on a positive note. Remember, your calm energy is what your dog will respond to.
Doing this regularly has made it a non-event for us. While this is what has worked for my dogs, every animal is an individual. If you\'re feeling very nervous, I always think it\'s a great idea to ask your vet or a trusted groomer for a hands-on demonstration first.