Bathing Your Dog Safely at Home
by admin in Pet Care Basics 106 - Last Update December 1, 2025

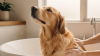
I still remember the first time I tried to bathe my golden retriever puppy. I pictured a cute, bubbly scene like you see in the movies. The reality? Water everywhere, a terrified puppy slipping in the tub, and one very stressed-out owner. It took me years of trial and error, a few conversations with my vet, and a lot of patience to turn bath time from a chaotic nightmare into a calm, manageable routine. If you\'re dreading your dog\'s next bath, I get it. But trust me, with the right preparation and approach, you can do this safely and without all the drama.
The preparation is everything
Honestly, I\'ve learned that 90% of a successful bath happens before your dog even gets wet. Rushing into it is a recipe for disaster. Taking 15 minutes to set everything up has been a game-changer for me and my dog\'s anxiety levels.
Gathering your tools first
I used to scramble for towels while a wet dog shook all over the bathroom. Not anymore. I now lay everything out within arm\'s reach of the tub. My non-negotiable toolkit includes:
- Dog-specific shampoo: Human shampoo has the wrong pH and can irritate their skin. I learned this the hard way after a bout of dry, itchy skin with my first dog.
- A non-slip mat: This is a critical safety step. A slippery tub is terrifying for a dog. A simple rubber mat provides security and confidence.
- Lots of old towels: I put one on the floor to soak up splashes and have at least two ready for drying.
- A washcloth: For gently cleaning the face without spraying water in their eyes.
- High-value treats: Something special they only get during bath time to build a positive association.
Creating a calm space
Dogs are incredibly sensitive to our energy. If I\'m stressed, my dog is stressed. I always close the bathroom door to prevent escapes and minimize distractions. I speak in a calm, reassuring voice throughout the entire process. No baby talk, just calm, confident encouragement. It makes a world of difference.
My step-by-step bathing process
Over the years, I\'ve refined my technique into a simple, repeatable process. This is what works for my dogs, from puppies to seniors.
- The water temperature test: I always test the water on my own wrist first. It should be lukewarm—not hot, not cold. A dog\'s skin is more sensitive than ours, and a blast of cold water is a sure way to make them hate the experience.
- The gentle soak: I avoid spraying my dog\'s face directly. I start at the neck and work my way back, using a low-pressure sprayer or a large cup to gently wet the entire coat.
- The lather: I apply the dog shampoo along their back and work it into a gentle lather, massaging it into the coat and skin. This is a great time to check for any unusual lumps, bumps, or ticks. I save the head and face for last.
- The thorough rinse: This is so important. Leftover shampoo residue is a primary cause of skin irritation. I rinse, and then I rinse again, until the water runs completely clear and I can\'t feel any slickness on the fur.
- The face wash: Using the damp washcloth (with no soap), I gently wipe around the eyes, muzzle, and the outside of the ears. This prevents water and soap from getting into sensitive areas.
After the bath: drying and rewarding
The bath isn\'t over when the water is turned off. The drying process is just as crucial for a positive experience. I start with a good towel dry right in the tub to get the worst of the water off. Then, I let them out onto the towel on the floor for a final rubdown. Some dogs tolerate a hairdryer on a low, cool setting, but I\'ve found my dogs prefer a vigorous towel dry and a case of the \'zoomies.\' And finally, the most important step: a high-value treat and lots of praise. This ends the experience on a positive note, making them more willing next time. Remember, this is what works for my pack, but every dog is an individual. If your dog has severe anxiety or skin issues, it\'s always best to consult with your veterinarian for personalized advice.