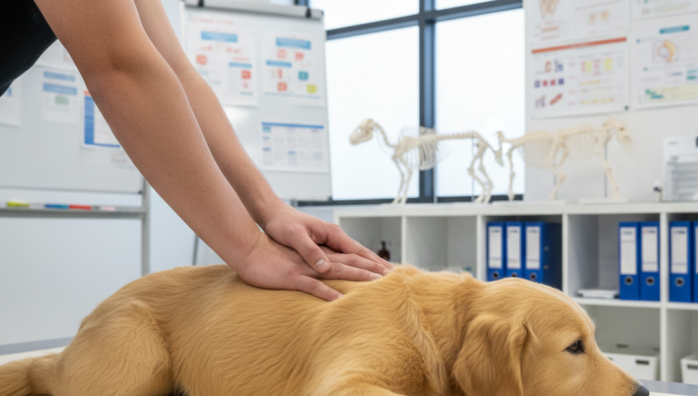
Performing Pet CPR Chest Compressions
by admin in Pet Care Basics 69 - Last Update November 21, 2025

I\'ll never forget the first time I was involved in a CPR effort on a pet. My hands were shaking, my heart was pounding, and all I could think was, \"Am I doing this right?\" It\'s a moment no pet owner ever wants to face, but one that drove home for me just how critical it is to have this knowledge before you need it. Performing chest compressions is the cornerstone of CPR, but it\'s not like what you see in movies. It\'s a physically demanding and precise skill. My goal here isn\'t to replace a hands-on training course—which I believe is essential—but to walk you through the core principles I\'ve learned and taught over the years, so you can be more prepared if the unthinkable happens.
The first step: confirm cardiac arrest
Before you ever start compressions, you must be certain your pet has no pulse and is not breathing. Compressing the chest of a pet whose heart is still beating can cause serious harm. Check for a pulse on the inside of the thigh (the femoral artery) and listen for a heartbeat. Look for the rise and fall of the chest. If there is no breathing and no pulse, you have a true emergency, and it\'s time to begin CPR while someone else is driving you to the nearest emergency veterinarian.
How to position your pet for compressions
Positioning is key to making your compressions effective. For most cats and dogs, you\'ll want to lay them on their right side on a hard, flat surface. This places their heart in the uppermost position. I\'ve found the floor is always better than a soft couch or bed.
For different body shapes
Not all dogs are built the same, which changes where you\'ll apply pressure. For most deep-chested dogs (like Greyhounds or Dobermans), you\'ll perform compressions over the widest part of the chest. For barrel-chested breeds (like Bulldogs or Pugs), it\'s often more effective to have them on their back and compress over the sternum, similar to human CPR. This is one of those nuances where a hands-on class is invaluable, but the general rule is to compress over the heart.
The technique: rate, depth, and hand placement
This is where the real work begins. Your goal is to manually pump blood to the brain and other vital organs. The key is to push hard and fast, and allow for full chest recoil between compressions.
Rate: keep the beat
The target rate is 100-120 compressions per minute. This is surprisingly fast. The easiest way I remember this, and what I teach others, is to compress to the beat of the song \"Stayin\' Alive\" by the Bee Gees. It sounds a bit strange, but it\'s a proven mnemonic that works under pressure.
Depth: be firm but careful
You need to compress the chest to a depth of about 1/3 to 1/2 of its total width. For a small cat, this is a much gentler motion than for a 100-pound Great Dane. For very small pets (under 15 lbs / 7 kg), I often use a one-handed technique where my thumb is on one side of the chest and my fingers are on the other, squeezing the chest that way. For larger dogs, you\'ll place one hand over the other and use your body weight to achieve the proper depth. Always remember, this is a controlled but forceful action. While there\'s a risk of injuring ribs, the alternative in a true cardiac arrest is certain death. This is always a difficult balance, but it\'s a necessary part of the process.
Combining compressions and rescue breaths
The current guideline for pet CPR is a cycle of 30 chest compressions followed by 2 rescue breaths. After delivering the two breaths (by closing your pet\'s mouth and breathing into their nose), you immediately return to compressions. Don\'t waste time. I\'ve seen people pause too long between cycles, but every second counts. Continue these 30:2 cycles until your pet starts breathing on its own, or until you\'ve arrived at the vet clinic and a professional team can take over. It\'s exhausting, so if another person is present, switch roles every two minutes to maintain the quality of the compressions. As always, please remember this information is to help you be prepared, but you should always seek immediate veterinary care in an emergency and consider taking a certified pet first-aid course.


